Garment Sewing Challenge Test Dress
May 11, 2012 § 10 Comments
As you all know, I haven’t been feeling quite myself lately and my crafting has suffered most of all. Then I saw this challenge from Rikka of Ricochet and Away and I just thought this was exactly the motivation I needed. Yet I still kept pushing it aside, saying I didn’t have the fabrics yet, I didn’t know what to do, blah blah blah and more blah. Till I finally decided to just shut up and do it already.
So here goes nothing 🙂
The challenge was to make a garment you would be proud to wear in public. Sounds easy enough, but then you also had to try something you’ve never done before in making the garment. So my challenge for myself was to make a drop-waist dress with pleats and elastic. I’ve seen so many tutorials out there using elastic but I’ve been too chicken to try it out. Well, no time like the present to boldly go where every seamstress must go sometime.
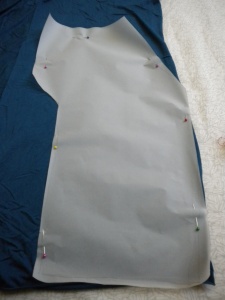
First things first, for the top part of the dress, I chose a favorite top and traced a pattern from that.
I kept telling myself I’d buy new fabric for this challenge but realized it was just another excuse. So we’re going to use a familiar aquamarine jersey for this dress.
Make sure the front neckline is lower than the back neckline, pin together and sew along the sides. Keeping arm and neck holes open, of course 😉
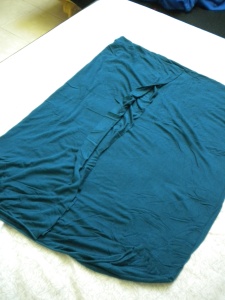
Now the skirt. I’m lazy, but that’s no excuse not to finish a challenge so I just put two ends of the leftover jersey together and sewed the open side seam closed to make a longish tube. I’m guestimating that for the whole dress I used up about 1.5 yards of fabric (yes, I am quite a small person).
So now, we need to put everything together.
Yes, you noticed that my thread is a much, much brighter blue than my fabric. But like I said, I was determined to at least do a dry run for this challenge this weekend, lack of right materials be damned. Which explains why I had to cheat on the pleats.
Instead of sewing them in place vertically, I sort of basted them in place. I figured this would at least hold their shape a bit. Now to sew the top and bottom together.
Sew the top and bottom together by inverting the top ride side in the skirt, topstitching the wrong side of the skirt. I hope that makes sense, I still get confused about it in theory but it works out right when you actually do it 🙂 Now for the exciting part: sewing on the elastic.
I’ve seen so many tutorials for this but never really thought it would work. Truth: it does! I took the elastic all the way around the sewn together ends of the top and bottom (of course, you could just measure your hip but again, lazy) and cut the elastic about 3 inches shorter. Pin one end of the elastic to one of the side seams and sew about an inch or two, just to keep it in place. As you can see, my elastic was helpfully marked with zigzag lines I could follow so I sewed it on that way. After the first inch or so, start stretching the elastic as you sew all the way around until you get back to the pinned end. DO NOT stretch your fabric along with it. Especially since I was using jersey, this could have some disastrous results.
And you know what? I was done 🙂
It’s a bit on the plain side, even for me. I think for the actual garment I’m entering in the challenge I’ll do a little jazzing up to it and maybe shorten the skirt a bit more. But for now a bright sash will do and I’ll still be happy to wear this outside anyway. I’m just really happy to be sewing again 🙂


